Our Azure Monitor connector provides seamless 2-way integration of Enterprise Alert 9 with Azure Monitor. Once added to your Enterprise Alert instance, the connector will read your Azure Monitor alerts fully automatically and trigger alert notifications, e.g. to your team members on duty.
It also synchronizes the alert status from Enterprise Alert 9 to Azure Monitor so that if alerts are acknowledged or closed, this status is also updated on the according alert in Azure Monitor.
In the following it is described how you can setup and configure the integration.
Setup Step1 – Preparing Azure
The connector uses the Azure REST API. The credentials required to access it, are generated by a small PowerShell script that you can download below.
The script performs the following tasks for you:
- Logs you on to your Azure Subscription (please login with an administrator account)
- Creates a new enterprise application in your Azure AD, also refered to as service principal
- Creates a new role in your Azure IAM that only grant permission to Azure Monitor alerts for that enterprise application
- Joins the enterprise application to that user role
- Outputs some data that you need to configure app (see below)
Follow these steps to deploy these assets in Azure:
- Download the PowerShell deployment script from github here
- Execute the script and log in with an Azure account that has administrative permissions in the Azure Subscription in which you want to deploy the beforementioned Azure assets
- The script reads all available subscriptions in the Azure tenant, select the desired one
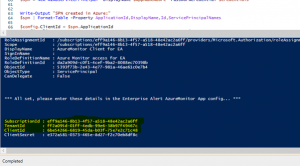
- The script creates all asses and finally outputs the following information:
- In the Azure Portal, open Active Directory and click on “App registrations”
- Click “All applications” and search by client id which was displayed after running the PowerShell script

- Now open the details of the application and click “Certificates and secrets” in the left hand menu
- Under “Client secrets” click “New client secret”, enter a name and select the preferred validity
- Make a note of the client secret value. You will need it the next section

Setup Step2 – Create the Connector in EA
After we have prepared Azure, let’s create the connector in Enterprise Alert as follows:
- Log in to EA and open System -> Event Sources
- Click “New Source”
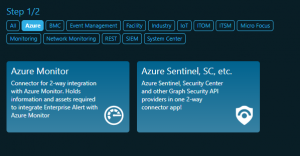
- Filter the tag cloud for Azure and then click on Azure Monitor

- Now find the Choose button and click it to create a new connector instance
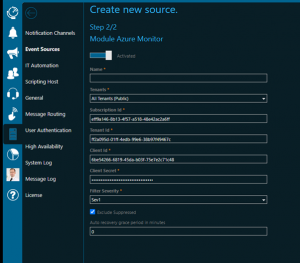
- Select a name for the new connector and configure the following fields:
- Subscription Id: Enter the value that was outputted by the PS script
- Tenant Id: Enter the value that was outputted by the PS script
- Client Id: Enter the value that was outputted by the PS script
- Client Secret: Enter the value that was displayed when you created a new client secret for the application in the Azure Portal
- Filter Severity: If an alert in AzureMonitor has a severity that is not selected here, it will be discarded.
- Exclude Suppressed: If enabled, and an alert in Azure Monitor has suppressed action(s) managed by your action rules, then it will be disregarded and not be retrieved.
- Auto recovery grace period in minutes: Delays alert notifications to the team for the number of minutes you enter here. Even better: if the monitoring condition is Resolved or the alert state is no longer New after that time (calculated based on alert fired timestamp), your team won’t be notified at all. Align this value with the amount of time you expect your auto-recovery actions or jobs to take but keep them shorter than 2 hours (max value here)! Otherwise your team will be notified immediately for each retrieved alert.

Click save to create your connection which should display an OK status shortly.
Ready
Your new connector will now send events whenever there are new AzureMonitor alerts matching your filter criteria. You can then add alert policies and compose your desired alert notification workflow.

